Wondering which brow style is the best for you?
Step 2
Before Booking
Now that you’re the right candidate, select a technique. If you are unsure of which procedure might suit you best, we can make recommendations through the picture you provide via text or email. Or take the quiz!
If you have had PMU done previously, please do mention it in the text 781-808-1650.
Step 3
Response From Us
Once booked, go to Before Care and make sure you follow the before care prior to coming in for your appointment. Also, please read the After Care instructions so that you can plan better for your after care. The results of the procedure will depend on how well you follow the before and after care.
Step 1
Consultation
The consultation is important. Although you’ve read all of the contraindications before booking and followed the Before Care for your procedure, we will need to evaluate your skin type, allergies, and any medical conditions.
We’ll talk about your lifestyle, makeup, and eyebrow routine. We’ll discuss what your biggest struggle is and what you love about your brows now and lastly, what style you would like them to look like after.
Step 2
Map & Color
After we learn your preferences, we’ll map out, draw, and measure your new brows using your facial features and bone structure so that your new brows fit naturally with your entire face.
Eyebrow mapping is done by using various tools such as the Golden Ratio Method to measure 6 points on the brows. The rest of the hairs that are outside of the lining of your new brows will be removed by either threading, tweezing, or razor removal to lessen any pain to give you clean, fresh-looking brows.
Topical numbing cream will be applied during the tattoo process. Depending on the technique, numbing is applied at various steps of the process. You may request to skip the process of numbing.
While we wait for the numbing cream to work, we will decide on the color together. Letting it dry and oxidize on your skin to ensure the best color.
We don’t start until you are completely happy with the shape of your new brows.
Step 3
Gentle Tattooing
If Microblading, we will then remove the numbing agent and carefully draw small hair-like strokes within the shape with a manual pen comprised of a row of mm-sized needles, which makes the form of a “blade” (it is not actually a blade). With the new strokes, pigment is then deposited into the skin, under the first layer of the skin. IF shading, unfortunately we do not numb during the first pass to ensure the required precisce outline does not get smudged. All clients have been able to tolerate the outlining process. We alternate brows and build up to the desired density. Either soft, medium, or bold which we will discuss during consult. We will perfect and add any extra strokes or shading that are needed before your brows are revealed to you.
Please note that any PMU (permenanent makeup) requires at least two sessions, where the second session is a touch up. it is important to be conservative the first time. We can always go darker and bolder at thetouch-up! If you have opted for “Combination Brows” this is where we add shading to create shadows and dimension to match your natural hair density.
Step 4
The Reveal
Microbladed brows will soak in pigment for about 8 minutes. Shaded brows does not require a pigment soak. After, any excess pigment will be wiped away and your new eyebrows will be revealed!
No more stressful morning application trying to achieve shape, density, and symmetry. No more stress of accidentally wiping your brows away. Go on and jump in that body of water, enjoy your life because we may still have 99 problems but your brows ain’t one!
Step 5
Slay
This part is the beginning of caring for your new brows by following the After Care to ensure proper healing. After the healing process, you get to go out and SLAY with your newly enhanced brow game.
Sleep in a little longer. And when your partner asks you when you’ll be ready, you can give a more accurate time (we all know it takes more than 5 more minutes!) and strut with confidence knowing your brows will be appreciated by other brow queens.
Step 6
Touch-Up
Requiring a touch-up depends on various factors including how conservative our approach is, the way your body absorbs pigment or rejects, how well you adhere to the before and aftercare, and the type of technique chosen. This is usually a two step process (sometimes three). The healing process will take 2 weeks (when there are no more scabs) and 4 weeks for the ink to fully settle into the skin. If you are unsure about needing a touch-up please send us a picture of your brows 4 weeks after the initial procedure to 781-808-1650. At this time, we will reevaluate how you’ve healed and provide you with next steps. In case you want to go darker or bolder and add more strokes where strokes have faded you should book a touch-up appointment. Until then, enjoy waking up with eyebrows.
Until then, enjoy waking up with eyebrows.
Step 1
4 Weeks Before Procedure
Please be mindful of acne cream treatment because this thins out and oversensitizes the skin.
We’ve learned that antibiotics have slowed down healing. Understand that the healing process (approximately 2 weeks) can take longer if you’re on them (4 weeks +).
No laser or chemical peels should be done 4 weeks before your procedure.
No sunburns on your face. Ink will not stay.
AHA (Alpha Hydroxy Acids) such as lactic, glycolic, citric, retinoid, and tartaric acids or any Over the Counter creams and lotions for tone correcting anti-aging can cause premature fading. Expect to come in for more touch-ups if this is the case.
Step 2
48 Hours Before Procedure
No Botox 2 weeks before or after. Although, we prefer Botox treatments before Brow PMU treatment.
No eyebrow tinting, as this can confuse our pigment selection process.
Skin irritation or big blemishes on your brows? Please reschedule your appointment.
If you are feeling sick, having cold or flu-like symptoms, sinus/respiratory infection, please reschedule your appointment.
Do not wax, tweeze, or thread eyebrows; we’ll groom them at the session.
No alcohol 48 hours before. This thins out the blood and will lead to patchy healed results.
Step 3
24 Hours Before Procedure
No caffeine or alcohol.
Understand that Aspirin and any blood thinners may cause extra bleeding, leading to patchy, uneven healed results.
Wear glasses instead of contact lenses if you’re getting eyeliner tattooed. Also, the way we stretch the skin, we could inadvertently put pressure on the eyeball which could move your lens around.
Avoid working out or strenuous exercises as this increases blood flow.
Avoid thermogenic and stimulants that elevate blood pressure and blood flow.
During your menstrual cycle, you will be more sensitive.
It’s important that you come in with how you normally do your brows every day so we have an idea of your baseline and what you prefer.
Step 1
The Day Of The Treatment: First 12 Hours
With slight pressure blot the area with clean tissue to absorb any excess lymph fluid. This fluid is a clear like substance that may slightly build up on the brow area.
You may or may not have lymph fluid during this time. If you do, remove it so it does not form into a thick dry crust. If you fail to remove the fluid, when it dries and falls off, it’ll take pigment with it, leaving you with less than optimal retention and results.
Do this every few minutes until the lymph fluid stops secreting.
Step 2
Days 1-10: Wash AM/PM With Gentle Foaming Cleanser
When you wake up, wash your face and brows gently to remove any bacteria and dead skin.
Wash your face again at night before bed.
Only wash your face outside of the shower.
Wash in a gentle circular motion following your natural hair growth. Rinse well with warm (not hot) water.
Pat dry with clean paper towel then allow air to also dry the brows.
Step 3
Days 1-10: Moisturize
Allow brows to air dry for minimum of 5 minutes. The brows should be completely 100% dry prior to adding on ointment. Never put ointment on damp brows.
Apply a very thin layer of ointment with a Q-Tip. Do not use your hands.
The ointment should not leave a noticeable shine or film on the brows. You are only applying enough to moisturize.
DAY 1 TO 3:
Immediately after your procedure, brows will appear darker, bolder, thicker, and more defined. This is because the pigment is sitting on top of your skin and has oxidized (darkened in color from exposure to air)
The color of the pigment will soften gradually, do not be alarmed if you see some pigment on the tissue, as this is excess pigment and or lymph fluid that is naturally exiting your skin.
Please remember to remove the lymph fluid or any gooey substance that is forming on top of your brows. Color will gradually get darker day by day and up to 50-60% darker than the result. Your brow tattoo can appear more solid. This is normal.
Your brows may look a bit red still and feel tender. Some say it feels waxy. You may think everyone is looking at you and maybe they are admiring your brows but most likely you are a bit self-conscious of it and still need time to adjust your temporary new look.
Your brow area will feel like a sunburn. You may ice it to decrease the swelling and redness.
DAY 4 TO 14:
The flaking period is for approximately 14 days, keep in mind that this all depends on your immune system, stress level, diet, and how often you dabbed the brows on day one as instructed (every 5 minutes for 1 hour and every 15 minutes for 6 hours). Around this time you will experience flaking. Your brows will look patchy and uneven.
Do not pick your scabs; let them fall off naturally. If scabbing gets picked prematurely, it will result in missing pigment. Once the flaking process is complete, your brows will appear light (the lightest it will ever be). You are not yet ready for a touch-up During this time, the pigment will resurface to the top layer of the skin requiring two weeks.
The final look will take approximately 30 days after your procedure.
Oily skin tends to heal a more powdery look. The strokes blend in together. Those who bleed easily, take blood thinners, or consume alcohol may need more sessions because blood gets pushed out to the surface with less pigment retention.
DAY 15 TO 30:
Healing is halfway to completion. The color and definition of the hair strokes will begin to return. You can finally jump in that pool or if the ocean is your thing, then go for it. Just make sure you protect your brows from the UV rays by wearing the minimum 50SPF. The sun can significantly fade your brows and turn them into unwanted colors, either blue or green depending on your skin’s undertone. Your brows should begin to look soft and natural. A more blended look that matches your entire face.
Note that because of natural skin regeneration after the recovery period (peeling), brows may appear lighter than the original. This might give you the impression that the color is fading too quickly. Often even with the proper care, clients may lose original hair strokes making the brows look more uneven. This is normal. That is the reason why most clients need a touch-up after 4-6 weeks. Never rub the treated area as it will disturb the skin from natural healing.
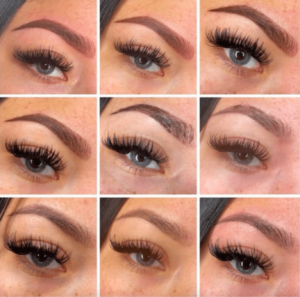
Here is an example of what the healing phases look like. Brows are dark, red, and bold on the first three days.
Flaking occurs and will fall off, and brows begin to look lighter. Pigment resurfaces after 30 days and will settle, then looks darker. After 30 days, clients will see the final result.
Nano Brows
Technique

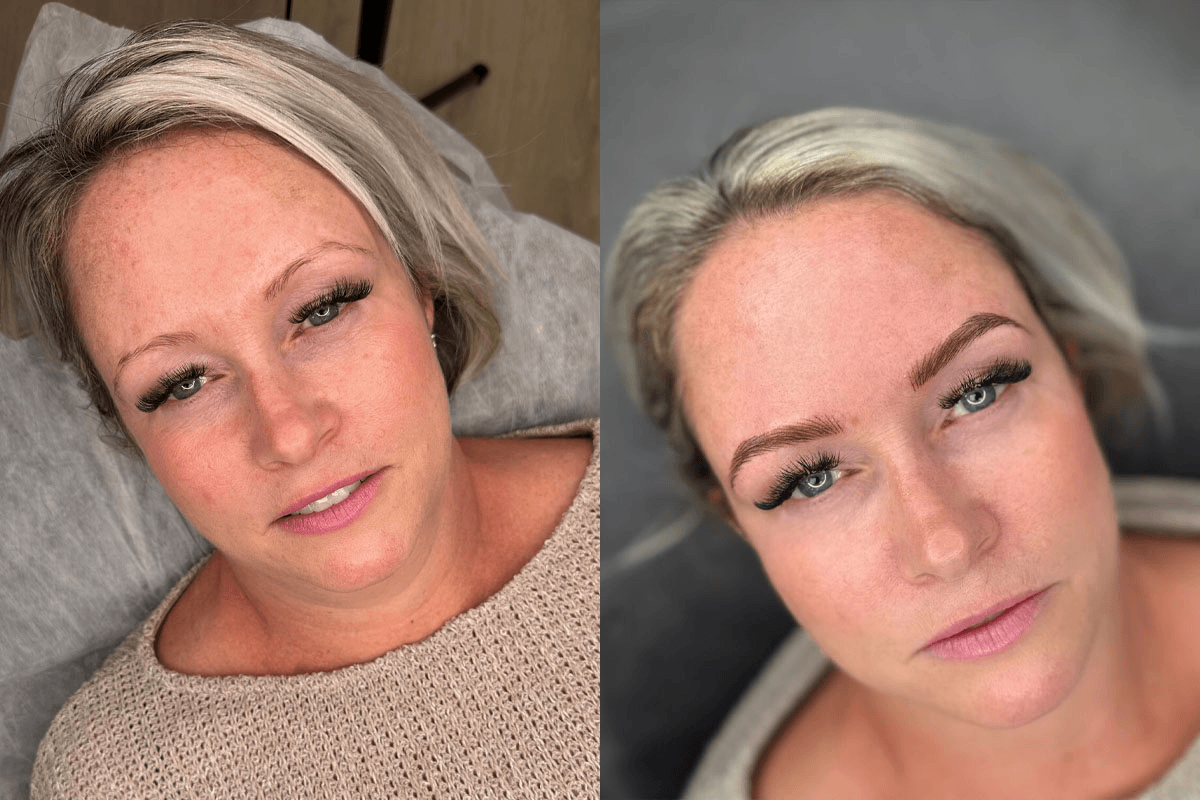
The Nano Brows technique is the next level of precision in permanent makeup, using an ultra-fine needle to create crisp, hair-like strokes that mimic the look of real eyebrow hairs. Unlike microblading, which involves small cuts in the skin, Nano Brows uses a delicate machine to implant pigment with minimal trauma—making it a gentler option for those seeking hyper-realistic results.
This technique is perfect for those with sparse or thinning brows, as well as clients with minimally oily skin, who may not retain microblading as well. Soft yet defined, Nano Brows is the most requested technique especially with clients who have alopecia, trichotillomania, and or are in remission from cancer.
Microblading
Technique

Microblading is a technique where we create small cuts in the pattern of hairs with the desired color into the brows to create the illusion of fuller looking eyebrows. This technique is great for you if you already have eyebrow hairs but it is light and sparse. Your results will be very subtle and natural. This technique is not recommended for those who are missing more than 60% of brow density, oily skin, or those living an active lifestyle.
Soft Ombre
Technique

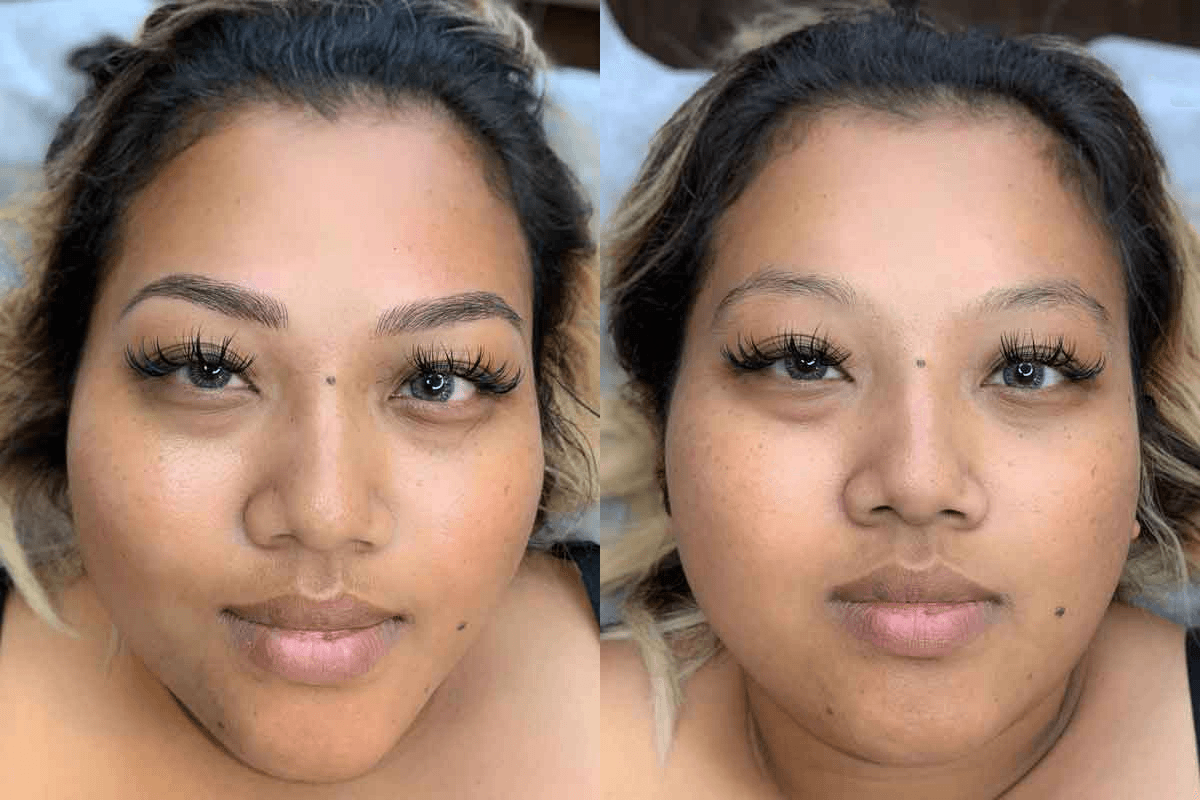
This technique is one of our favorite because it is suitable for all clients. Soft Ombré Shading or Powder Brows is shading or filling the entire brow with the ombré shading effect where the tails are the darkest and the front of the brows is the lightest. It heals to a soft makeup look or we can make it softer to give just the illusion of shadows and dimensions when combined with existing hair.
This technique is great for oily skin types, those who desire a soft makeup finish when healed, want the lowest maintenance possible, or are missing the arches and tails of the eyebrows. Bold at first but will heal powdery, soft, and beautiful as if you’ve just perfectly penciled and blended in your brows. Great for those who have mature and or sensitive skin since shading causes the least amount of injury.

Combo Brows
Technique

Combo Brows is a technique that is the most popular. It is the combination of Microblading hair strokes strategically placed where you desire the hair look plus we add shading to add depth and dimension for the most complete and natural look. This service is for you if you’ve over tweezed or have very minimal eyebrows but don’t want the statement look. Ideal for those with dry to normal skin.
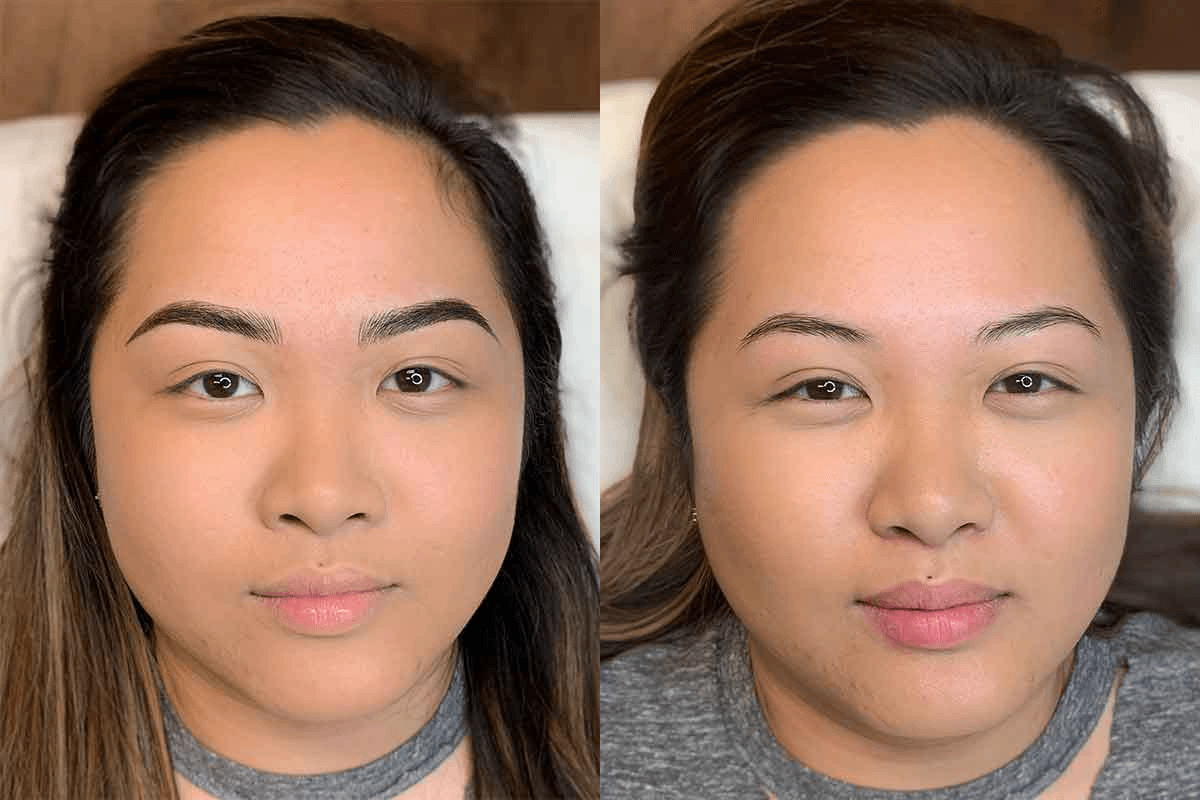
Man Brows
Technique

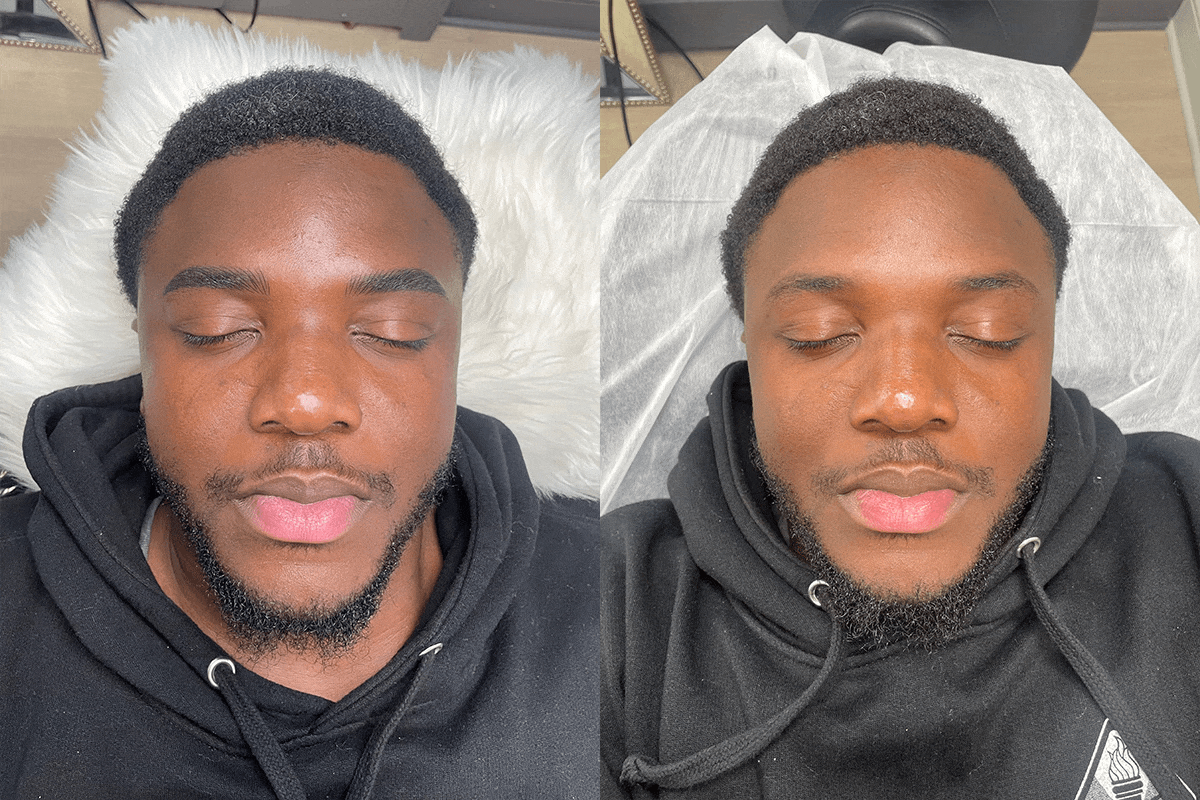
Gone are the days of patchy brows or hair loss due to autoimmune disorders or hormones—Man Brows is a technique designed specifically for men who want fuller, more defined eyebrows without looking overly groomed or artificial. Using a delicate rotary machine, we create natural-looking hair strokes that seamlessly blend with existing brow hair (if any), enhancing their shape while maintaining a rugged, masculine appearance that’s perfectly imperfect.
Man Brows heal to a soft, natural look—giving stronger definition without the hassle of daily upkeep. Those with an untrained eye may not be able to detect you had them done, but they’ll notice something is different.
Still confused?
Candidacy and Contraindication
ARE YOU AFFECTED?
◘ People who are anemic
◘ People prone to keloids
◘ People with glaucoma
◘ Those under 18 years of age
◘ If you are a hemophiliac
◘ Women who are pregnant or lactating
◘ People with allergies to makeup or pigments
◘ Active skin cancer in the area to be tattooed
◘ Those easily triggered post-inflammatory hyperpigmentation are not good candidates
◘ People with skin diseases such as psoriasis, eczema, and undiagnosed rashes or blisters on the site to be treated
◘ Those with transmitted low blood conditions like HIV or hepatitis
◘ People taking blood thinners (must stop 4 weeks prior to procedure, please advise your doctor)
◘ Having healing disorders, uncontrolled blood pressure, or had mitral valve disorder
◘ Those on any skin medication such as Accutane or steroids— which thin and over-sensitize the skin


